RDB and I were camping this Thanksgiving and I wanted to prepare a traditional meal for us, but I don't have a great history with cooking full turkeys, and, camper kitchens are notorious for being small, so I knew this was going to be ambitious, but, with a little prep - and a lot of planning - I believed it was possible! My proposed menu for the day:
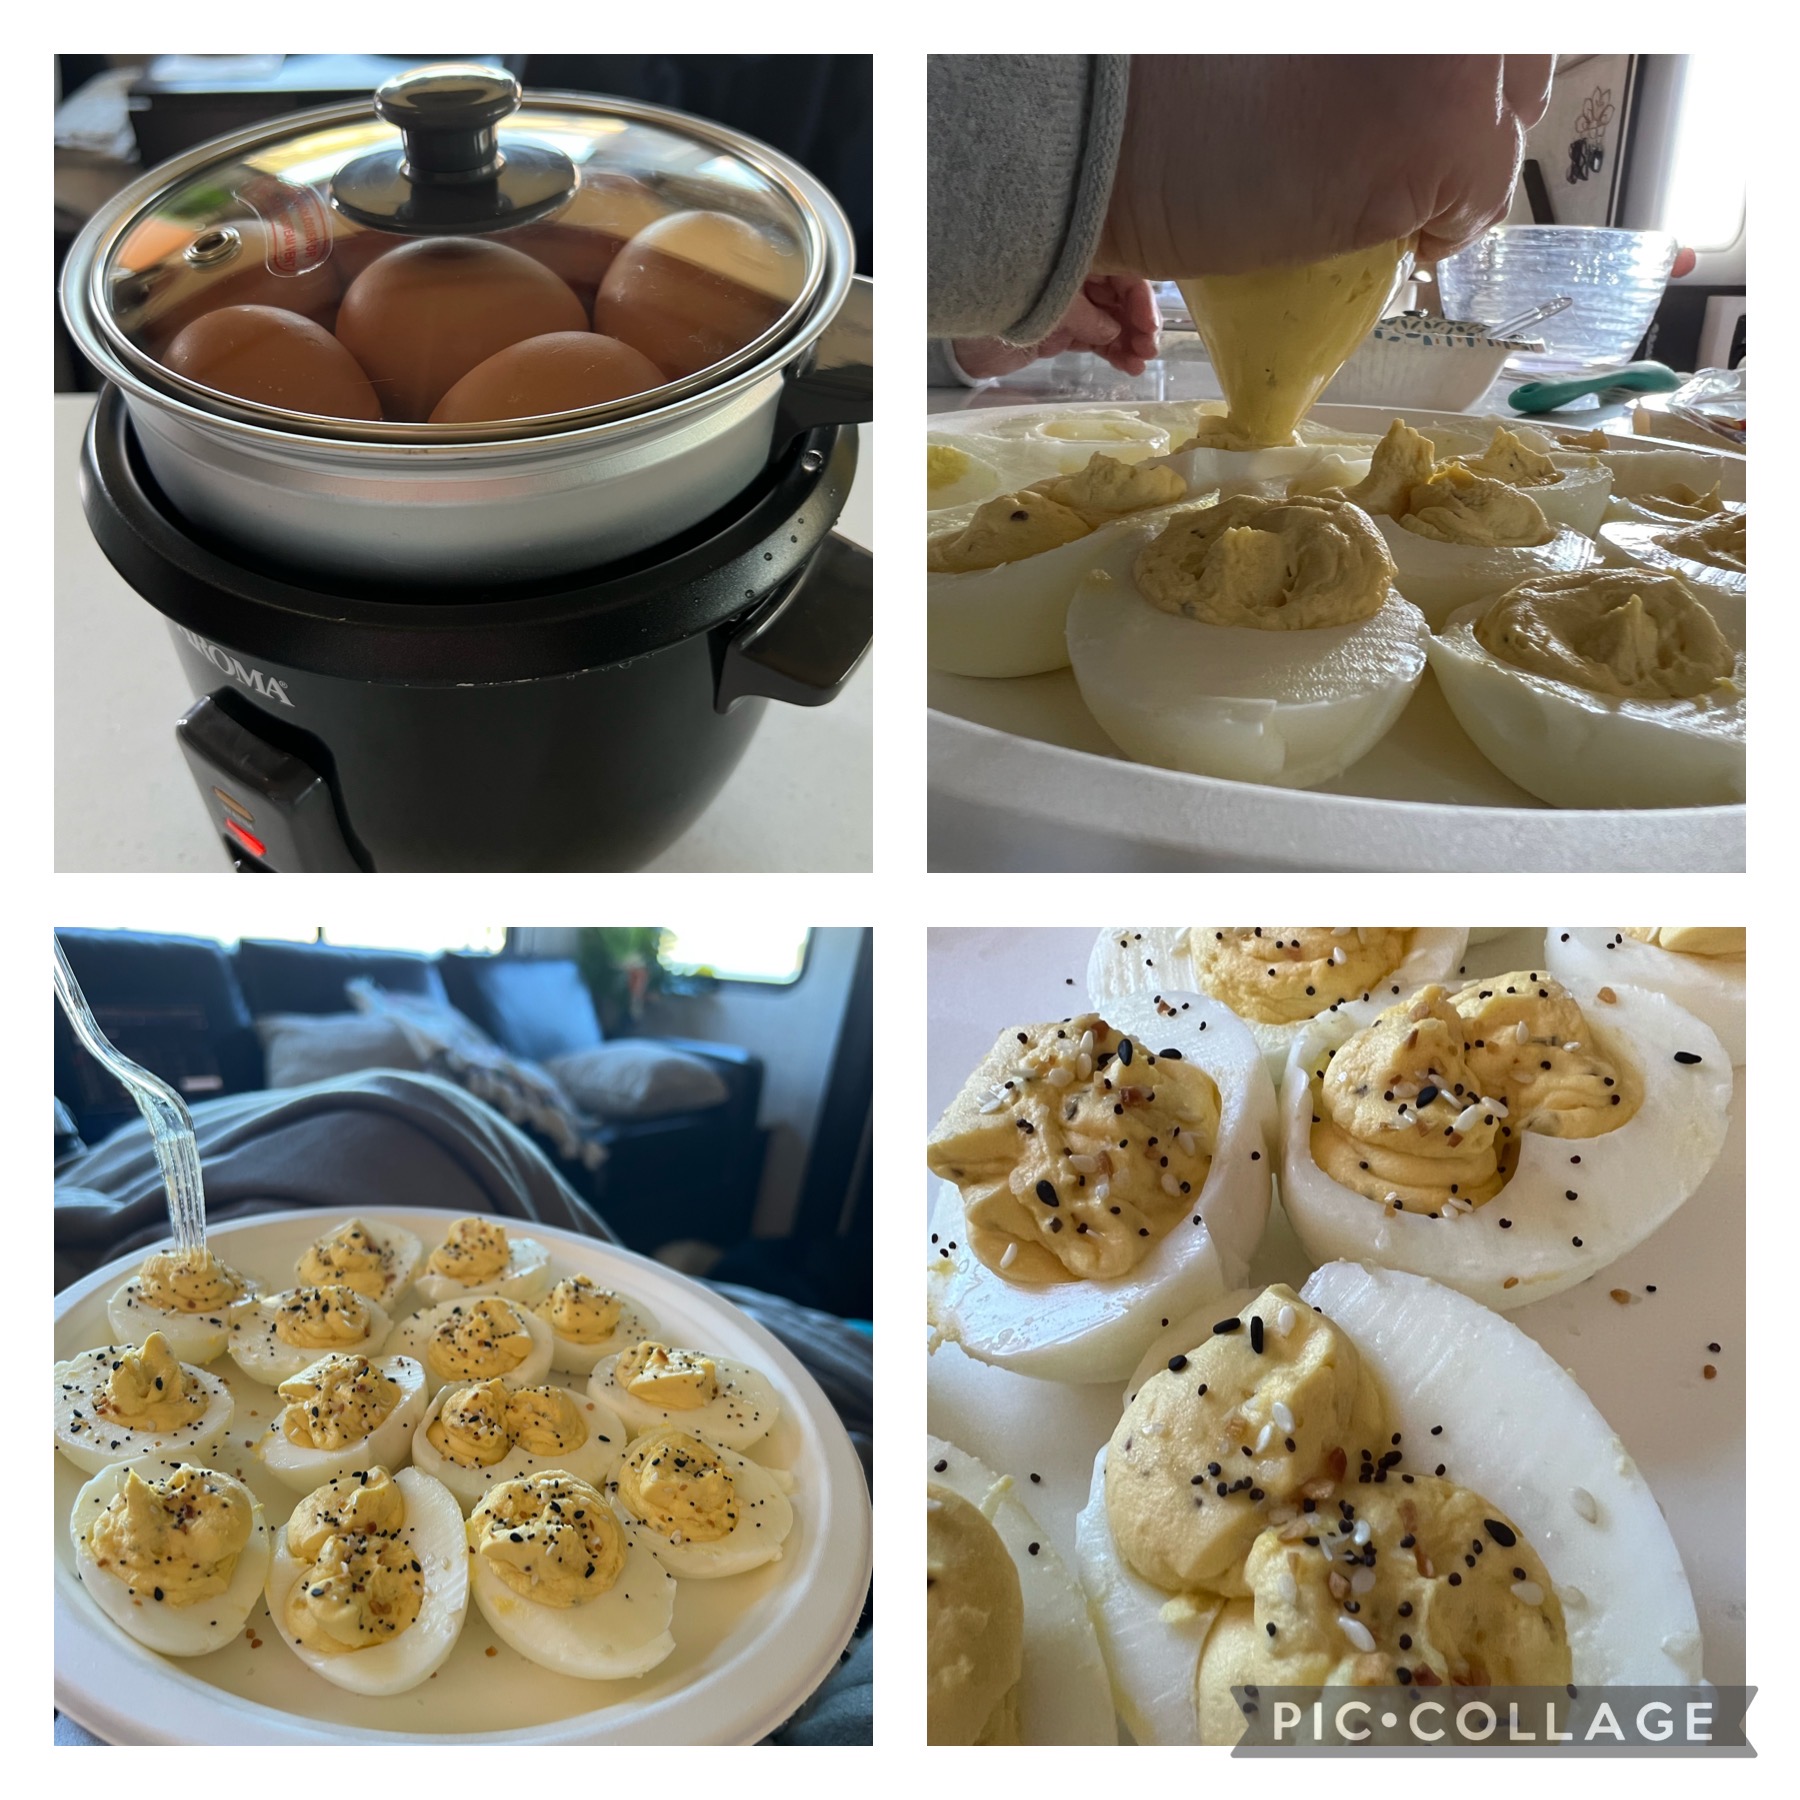
Everything-but-the-Bagel Deviled Eggs
Smoked Bone-in Split Turkey Breast with Mushroom and Shallot Gravy
Butter and Heavy Cream Cauliflower Mash
Asparagus with Balsamic and Olive Oil
OceanSpray Canned Cranberry Sauce
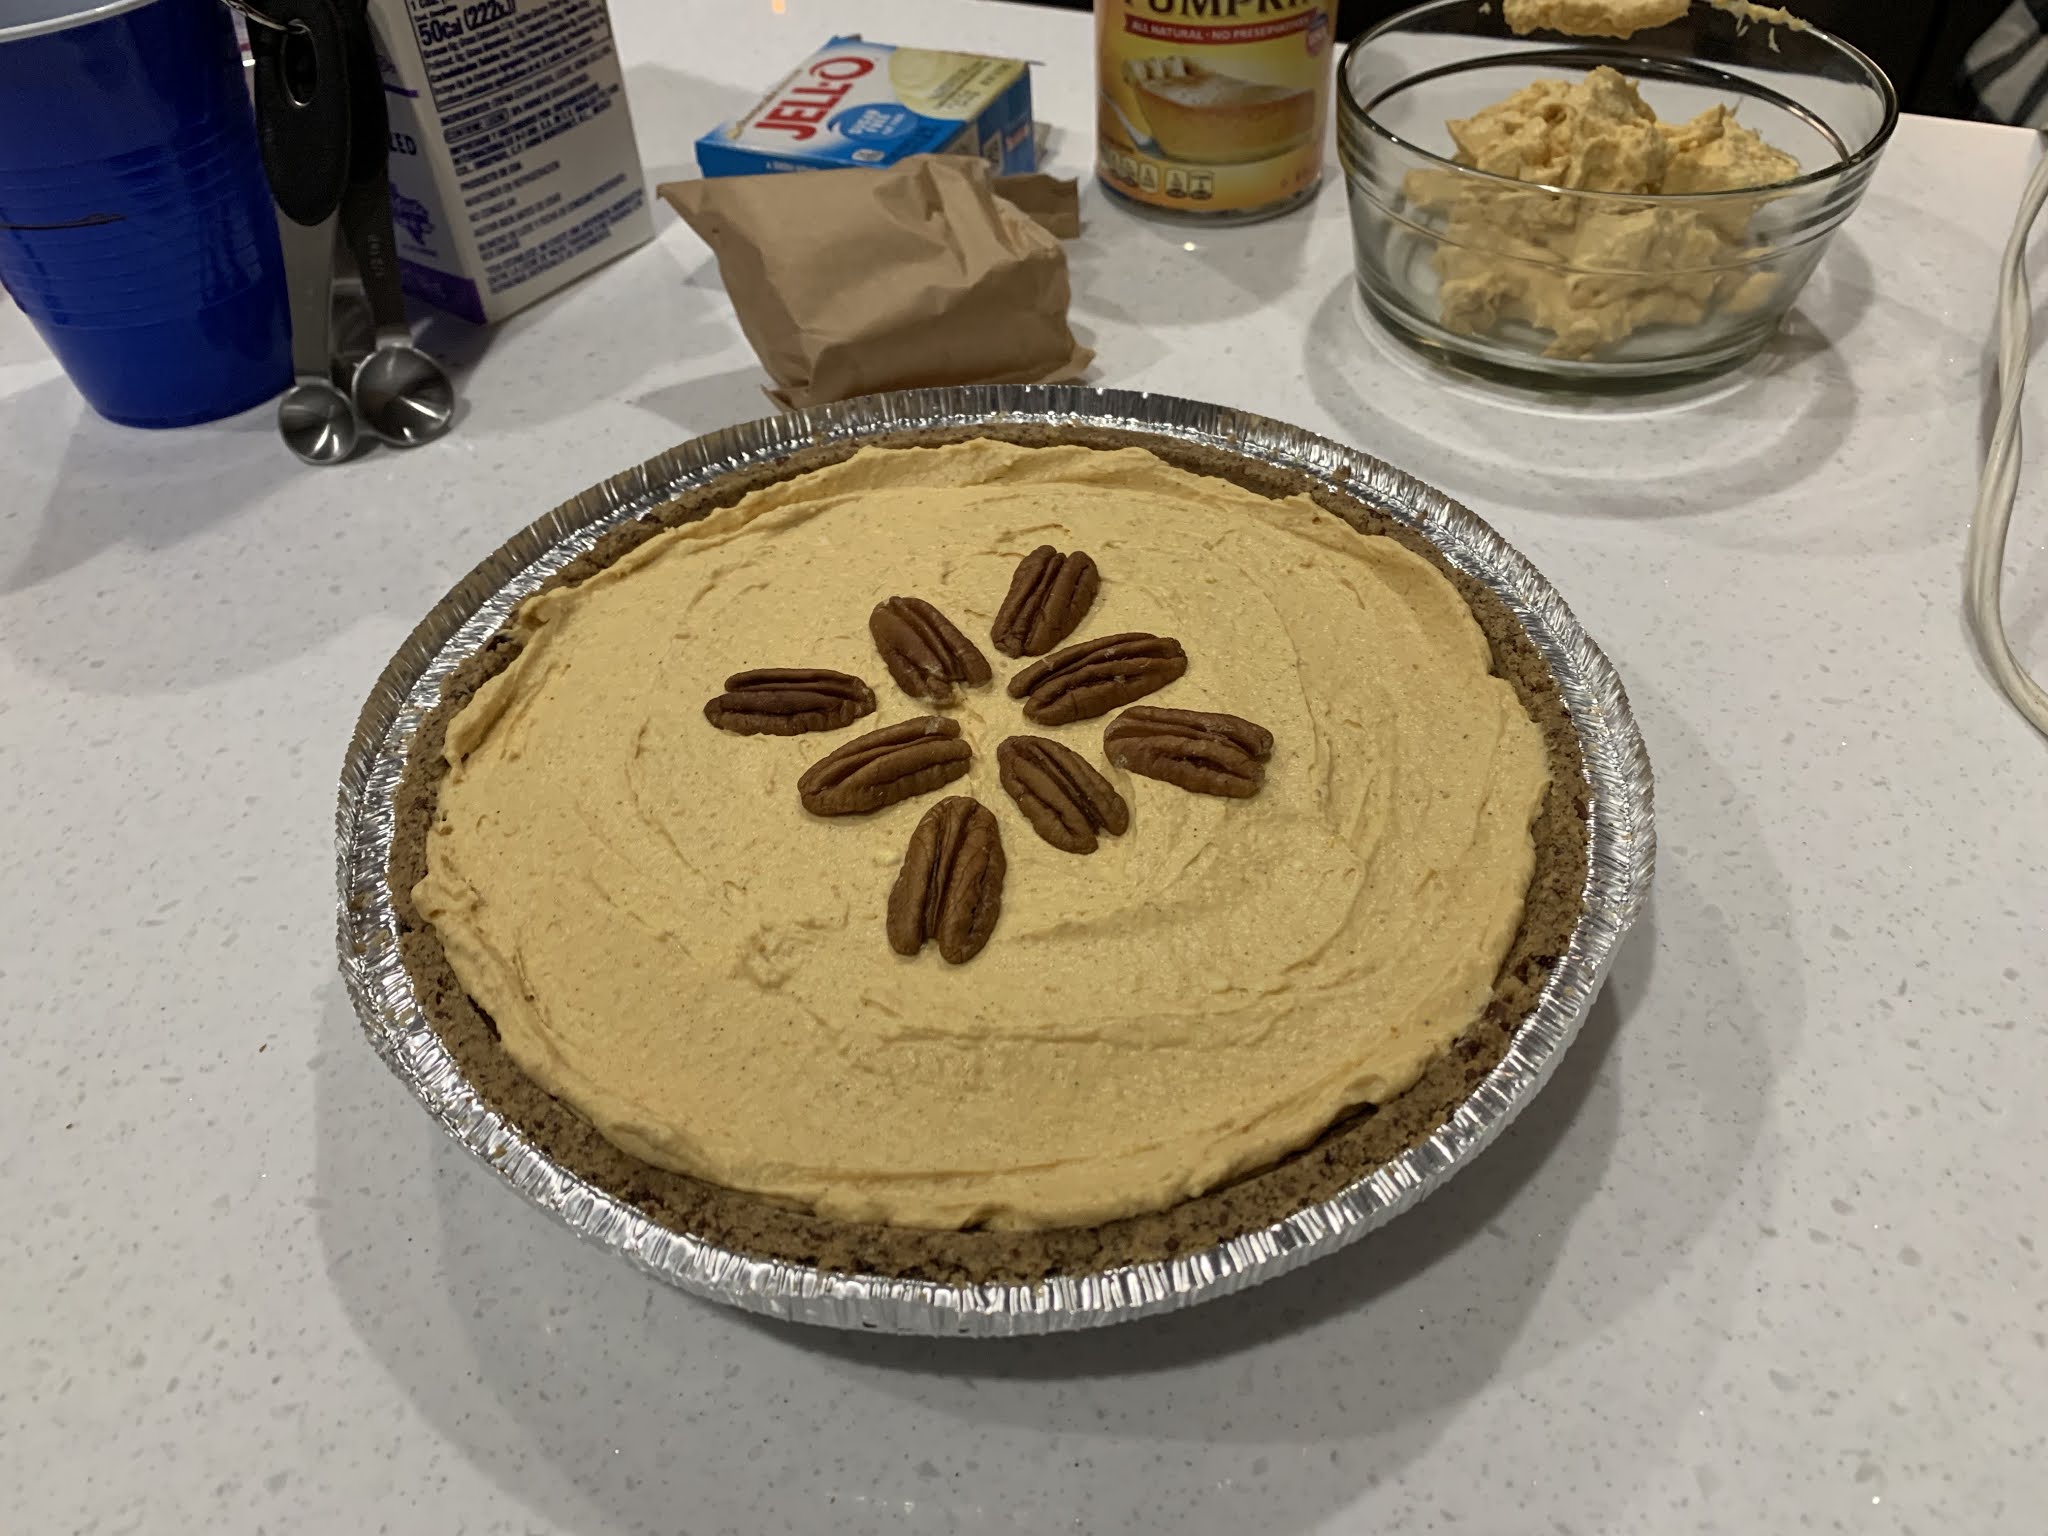
Whipped Cheesecake Pumpkin Pie
Tackling the biggest hurdle first, let's talk turkey. There's no way RDB and I could eat a a whole turkey, so on the few occasions we do want to roast one, we go for a bone-in split turkey breast. For the longest time, I didn't even know an option like this existed! It's about 3-4lbs of breast meat, skin on, with ribs still attached. Just about the right size for two people with a little for leftovers.

I dress my turkey with an onion, an orange, rosemary and thyme, LOTS of butter, broth (or stock concentrate) and salt and pepper. All the above went into a vacuum bag in prep for our camping trip, but if I'm cooking at home, I'll fill whatever pan I'm roasting in with a tasty pale ale, and into the oven it goes. This time, I'm skipping adding the liquids for sake of my cooking method for the camping trip: sous vide.
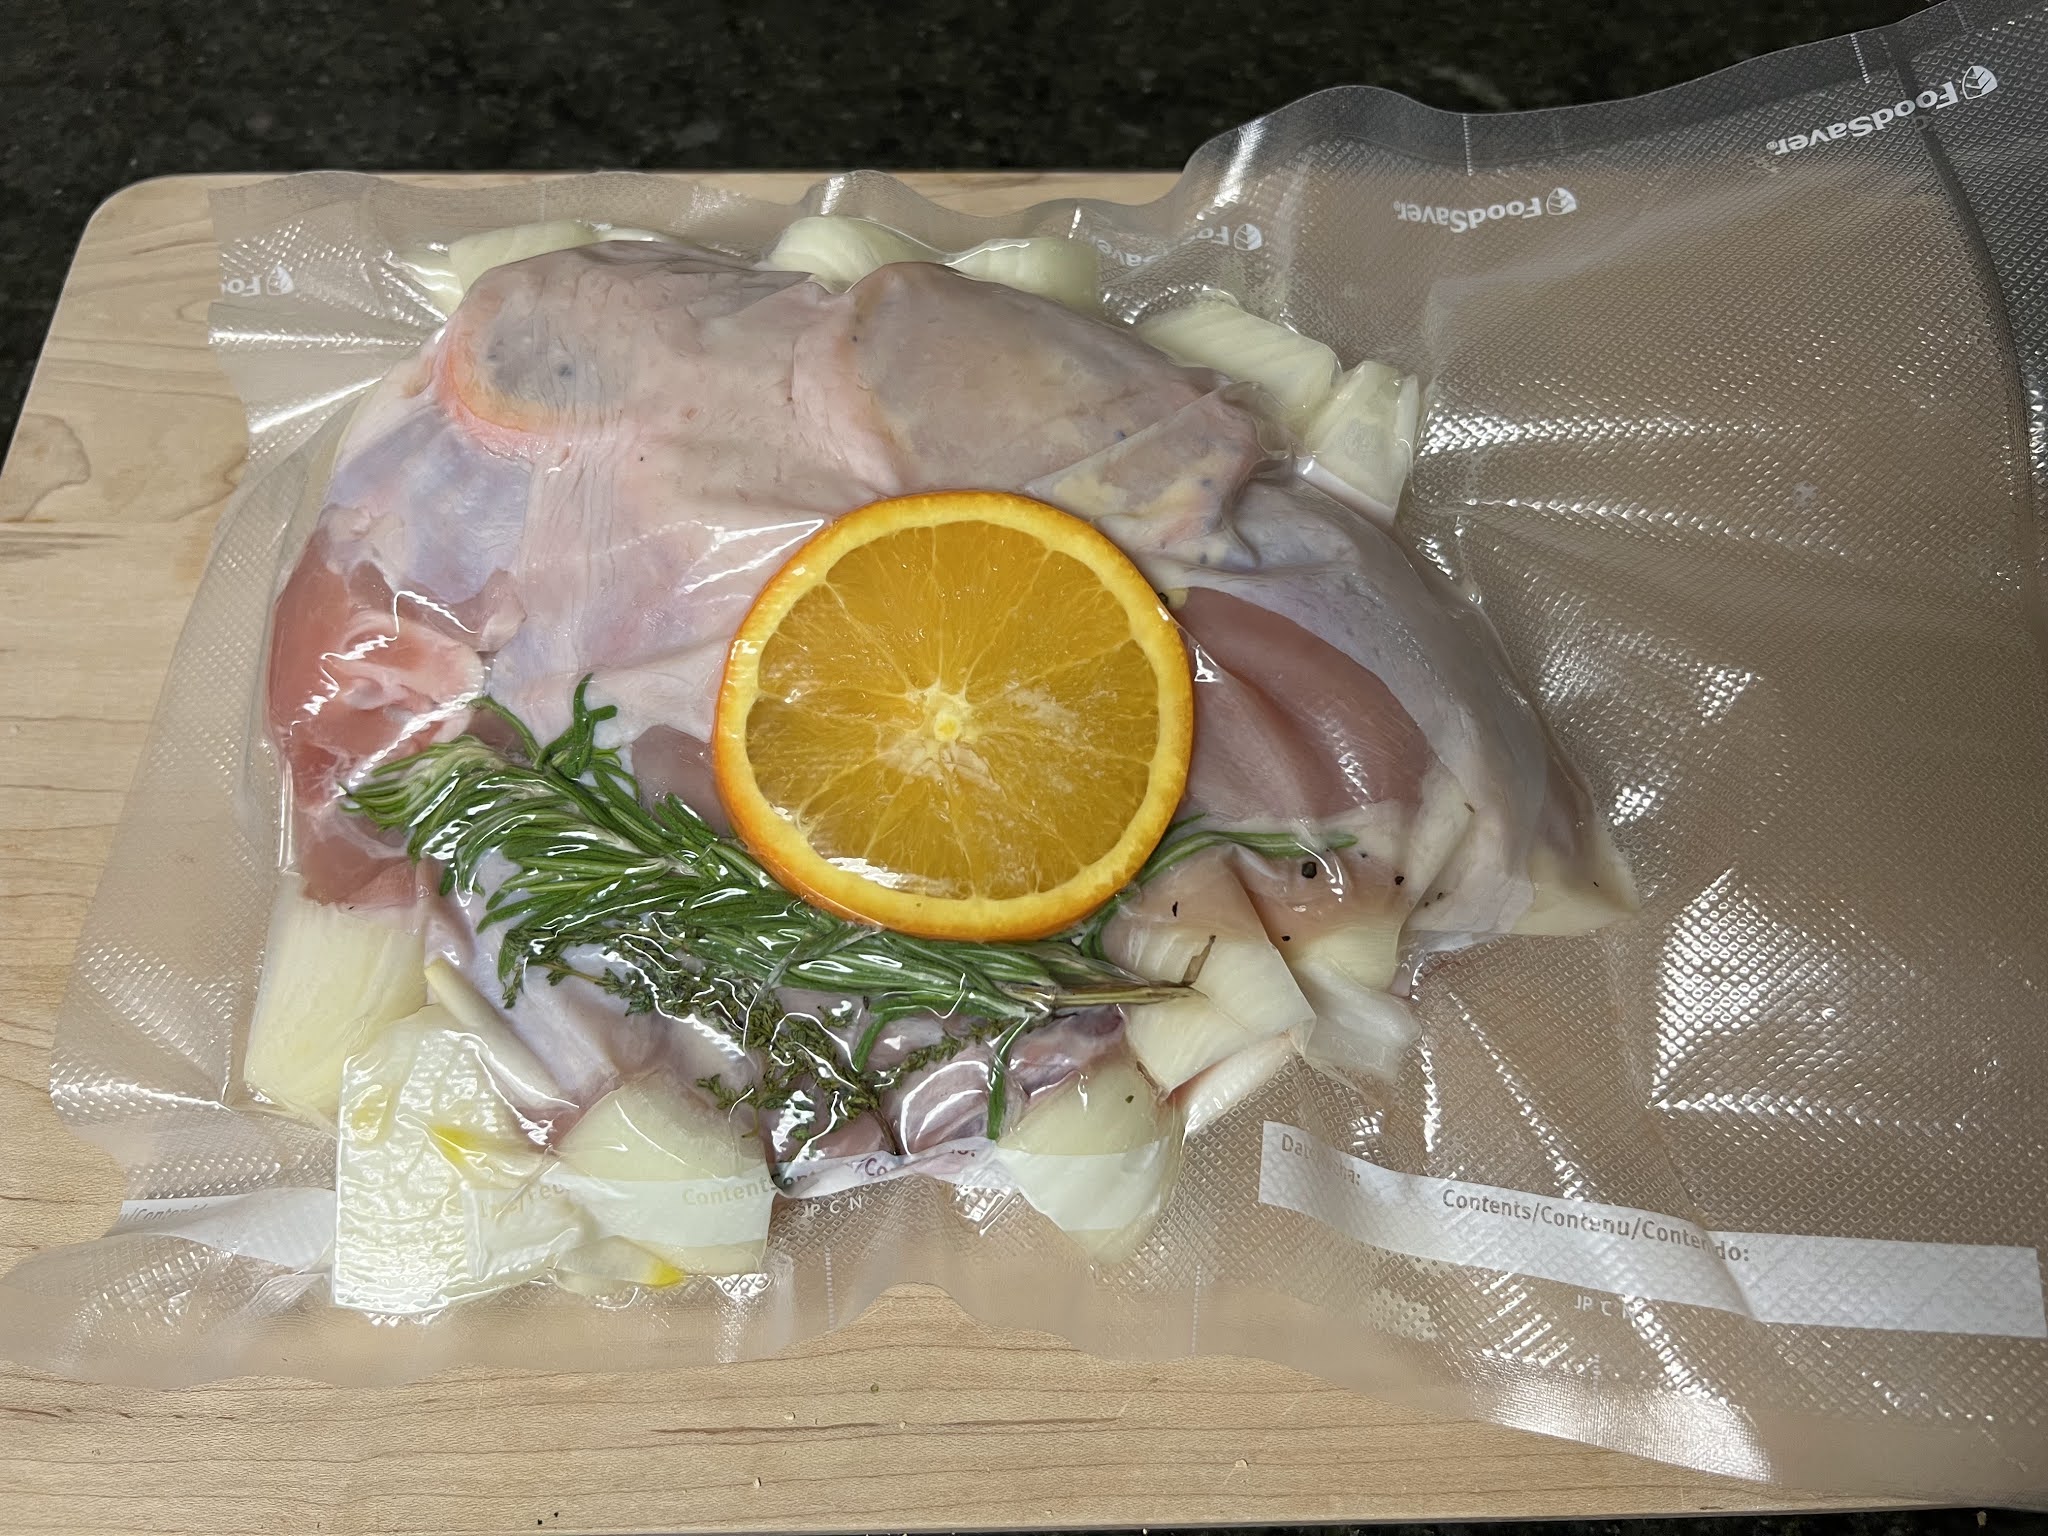

The turkey needed the most time underwater, about 6 hrs at 150*. After that, we put it on the pellet smoker at 400* for an additional hour or so to give it a nice mesquite smoked flavor and crisp up the skin. The first time I sous vide a turkey breast it was still pink inside; it was fully cooked, pasteurized actually, but it was a bit off putting (so it went into the oven to roast out the pinkness!) You'll also notice that sous vide cooking results in an odd visual appearance for most meats, so food is often finished off with time under a broiler or a quick sear in a hot cast iron pan to give it that 'done' appearance.
Spoiler alert: it was sooooo worth it!

Ok, with the turkey relaxing in the ‘spa’ and cooking, we enjoyed a few mimosas and then got the half-buzzed crazy idea that it wouldn’t be Thanksgiving without deviled eggs (My Lil Sis was always sure that we’d have a dozen or two for Thanksgiving at Dad’s every year). So, using our rice cooker and the steamer basket, I whipped up a quick set of deviled eggs. We even had one that had a double yolk (hello, good luck omen!). My personal tip: use Everything but the Bagel seasoning instead of paprika- the extra flavors it imparts are super tasty! Needless to say, they didn’t last long!
When the turkey came out of the jacuzzi and went out for a smoke, I got to work on the sides. A little prep at home made this so much easier to accomplish, too; I cut the cauliflower into one inch slices so that it would be a uniform size in the vacuum saver bag. The water temp goes up to 175* and the cauliflower slices stayed in the 'spa' for an hour to cook and soften. After that, I pureed them in my food processor with a ridiculous amount of heavy whipping cream and butter, added a bit of salt and pepper to taste and that one's done. (Yes, I have a small food processor in the camper. Come on now, if I'm #extra enough have an immersion cooker, is it really that much of a reach to think I'd have a food processor and electric mixer, too? We're way beyond our PB&J days here, folks!)


The asparagus was last, only needing about 8 minutes in the bath with the temp brought down just a bit to 165*. I used another method for bagging the spears - rather than vacuum sealing, you can use a gallon sized ziplock bag, put your ingredients in and then submerge the bag in water all the way up to the ziptop, pushing out the air, and seal. Balsamic vinegar and oil/avocado oil, and a little salt and pepper are the only seasonings the asparagus needs.

And, for nostalgia sake, canned jellied cranberry sauce makes this meal complete. Did you know they put the label on upside down on purpose? I attempted, and was incredibly pleased with, a homemade keto jellied cranberry last year, but with all the effort and a chill time that requires an overnight in the fridge, I decided to splurge on the OG* version from a can. (*original good)
 |
| All that talk of cranberry sauce and I forgot to plate it before the picture! |
We’ll, there you have it. A full (keto-friendly, mostly) Thanksgiving dinner with all the trimmings, cooked in our camper this year. But, of course, it wouldn't be Thanksgiving without dessert, so I made our favorite version of whipped cheesecake pumpkin pie. It's hard to go back to a traditional pumpkin pie after having this one, its so easy and tastes so good!
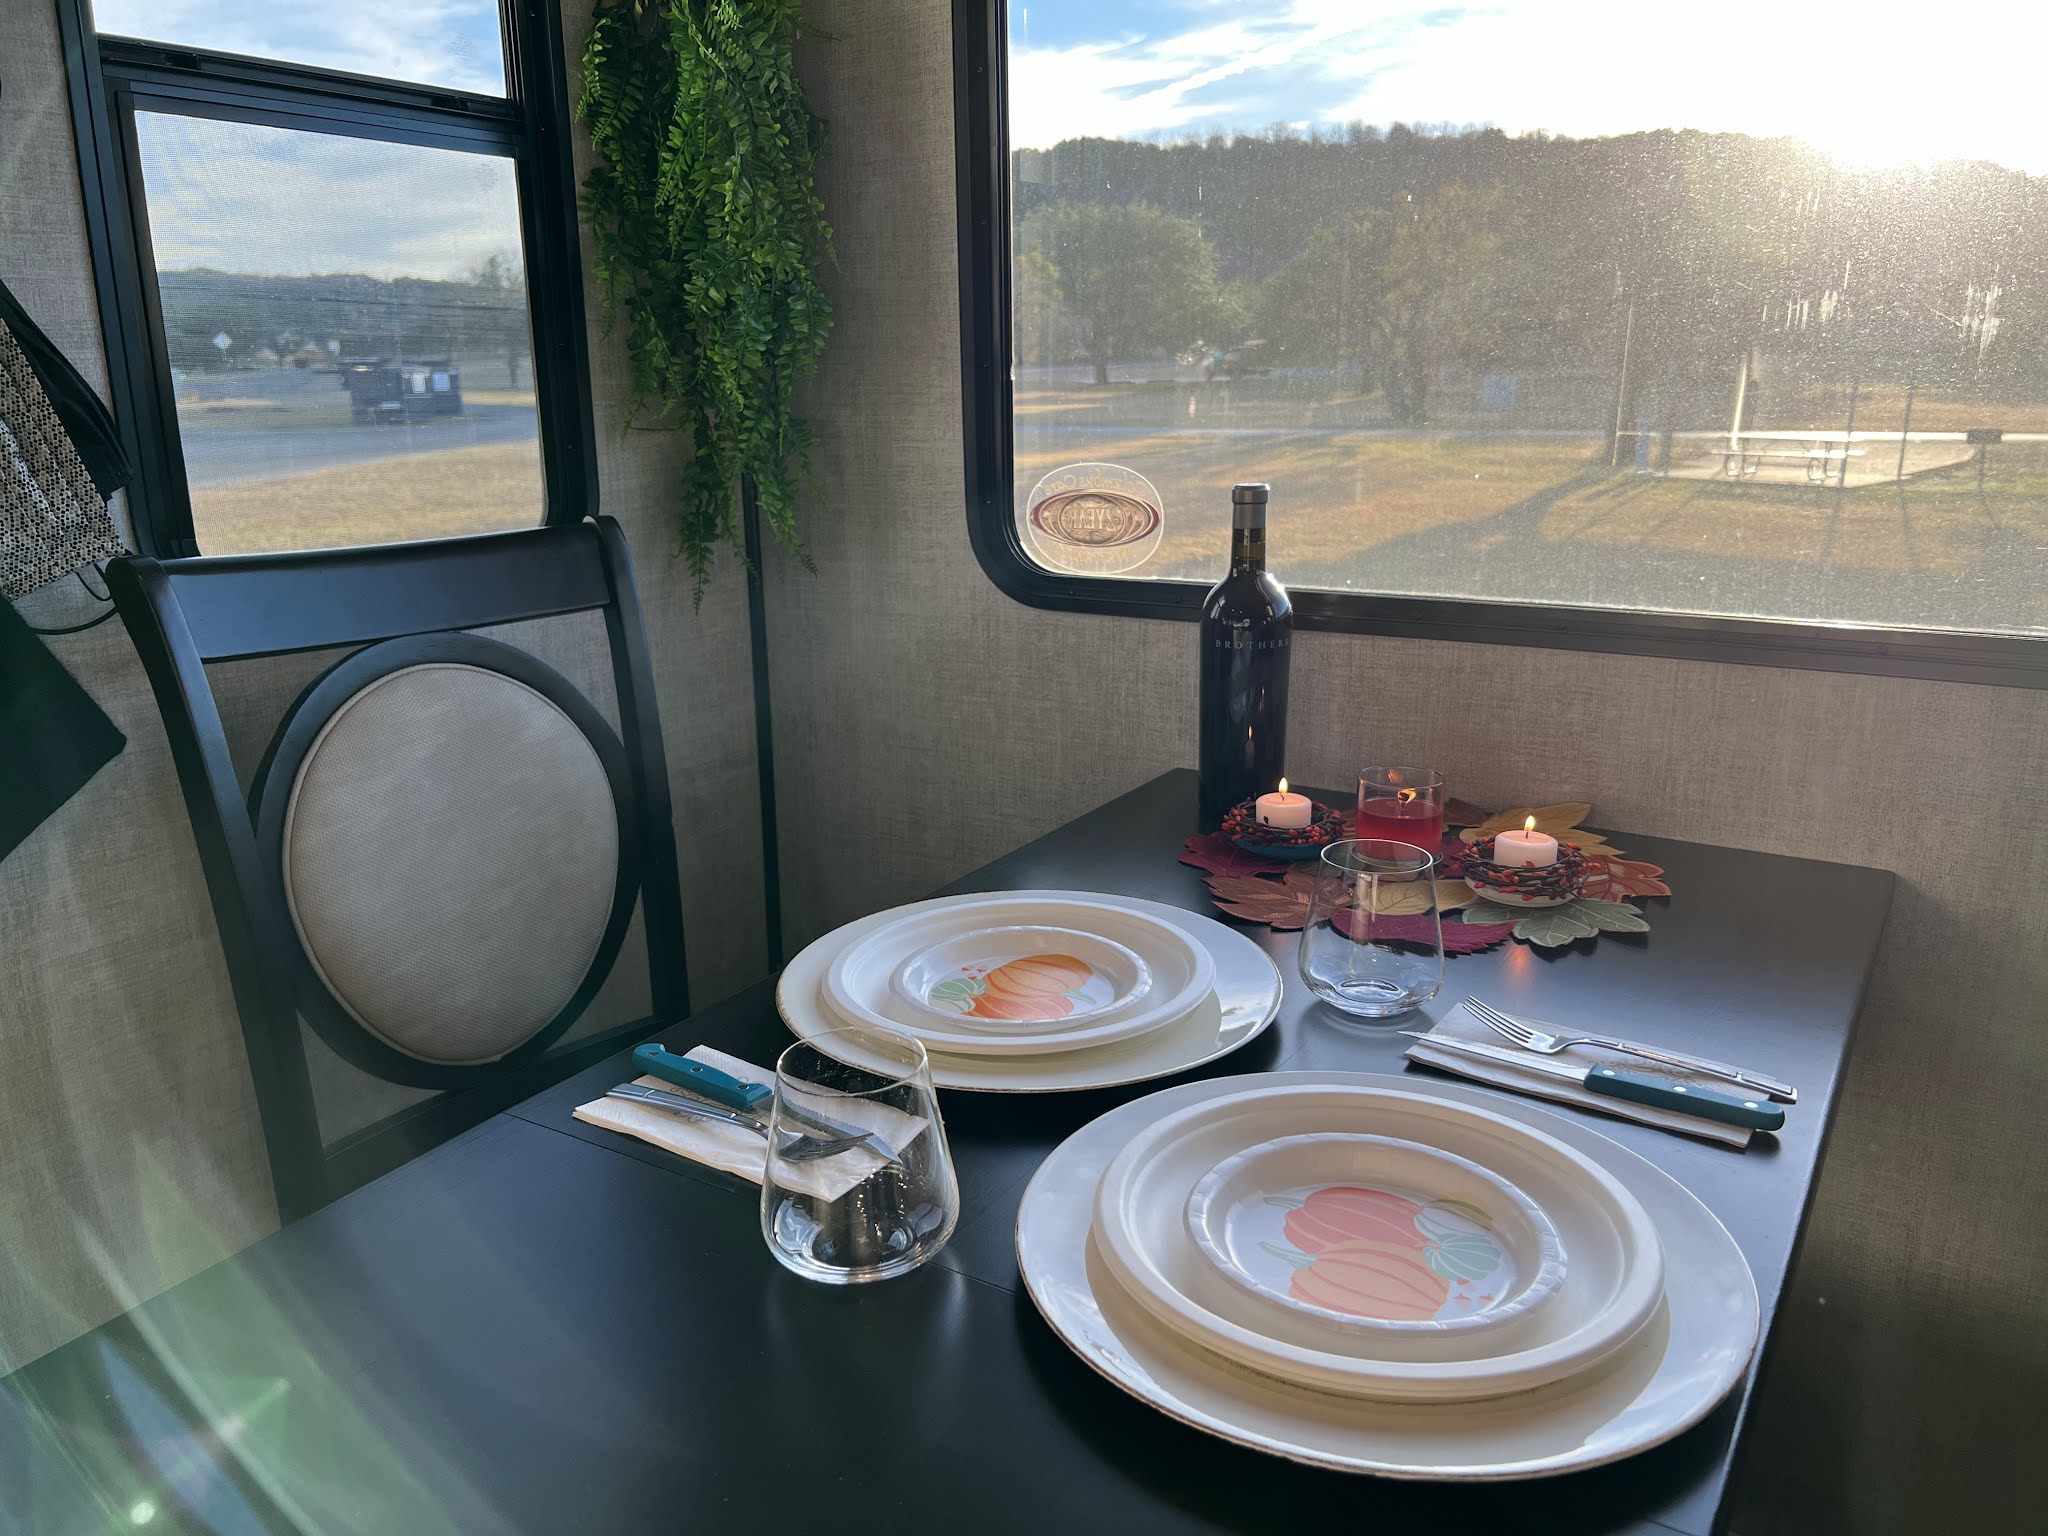
I hope that you had a splendid feast for your Turkey Day, and that you and yours stay healthy, find joy, and have all the fullness you can handle this holiday season!